CMS Guide
![]()
|
| The ‘Pencil’ icon puts the current page in and out of edit mode. |
|
| The ‘Gear’ icon allows you to change the settings for the current page. |
|
| The ‘Plus’ icon allows you to add items to the current page. |
|
| The intelligent search box allows you to search the dashboard. |
|
| The ‘Pages’ icon allows you to add a new page to your site. It also lets you see the tree of pages that make up your site and any drafts that have not yet been approved |
|
| The ‘Sliders’ icon allows you to view the dashboard. You can also control the settings for the website in the dashboard. |


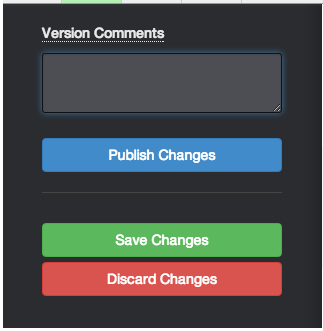
 icon to make changes to the current page. After making the edits, click the pencil icon again to leave the edit mode. When you leave the edit mode, the following fields are displayed that helps to add explanation, publish and save changes or discard the changes.
 - Version Comments: You can add explanation about the changes made to the page in the edit mode. It is useful as it indicates where changes were made. You can roll back to an older version later.
- Publish: You can save the edits, and make them live for all the site visitors.
- Save Changes: You can save the edits as a new version. The changes are only visible to the editors/administrators who have access to edit this page. When they visit this page they will see the most recent version, but regular site visitors will only see the last published version.
- Discard Changes: You can discard all the changes you just made, forever.
 icon to change settings for the current page. You can view and make the changes for the following:
 - Design: You can change the ‘Page Template’ and apply a desired ‘Theme’.
- SEO: You can change the page ‘Name’ and ‘URL Slug’ of the page.
- Attributes: You can make changes to the different types of attributes like: ‘Navigation and Indexing’ or ‘News’ and other attributes that are available for the page.
- Caching: You can define caching for the page.
- Permissions: You can define ‘Page Permissions’ for the users.
- Versions: You can view a list of versions for the current page. Additionally you can either approve or duplicate the version. You can also add a new version or delete the version.
- Mobile Preview: You can view the site as it appears on a mobile or on an iPad.
- View as User: You can view the site as a guest user.
- Delete Page: You can delete the current page.
Note: You have to click the ‘Save Changes’ button (except ‘Versions’) to update the changes for all of the above.
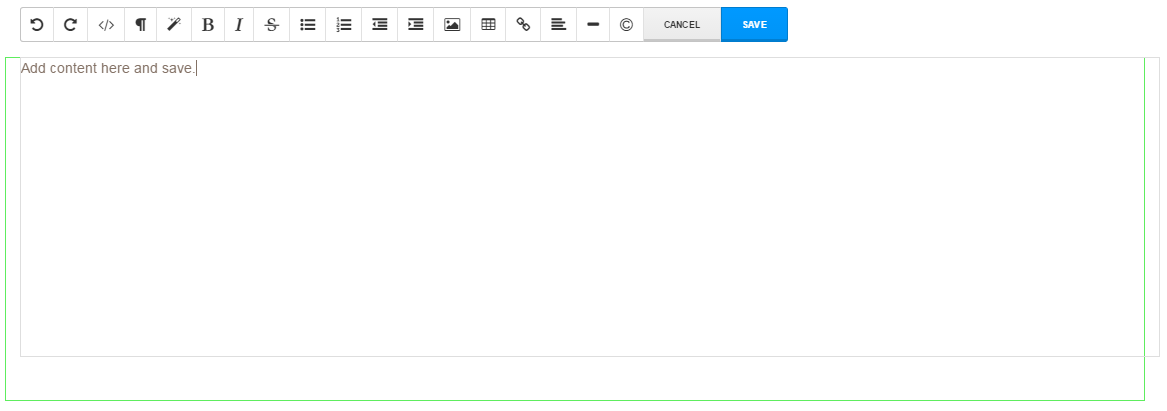
 icon to add content to the current page. You can add content using the following:
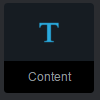
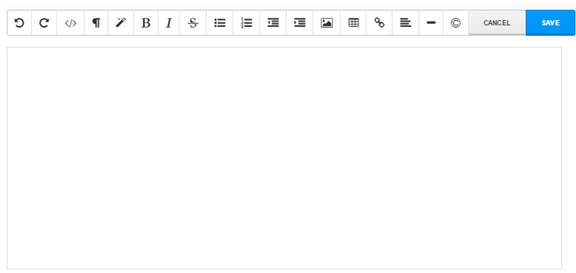
 - Content: This block is useful when updating basic text and images like headers, paragraphs and more. If you are adding links, you can use the following three options:
- Add a link to an internal page
- Add a link to an external page
- Add a link to a file for download

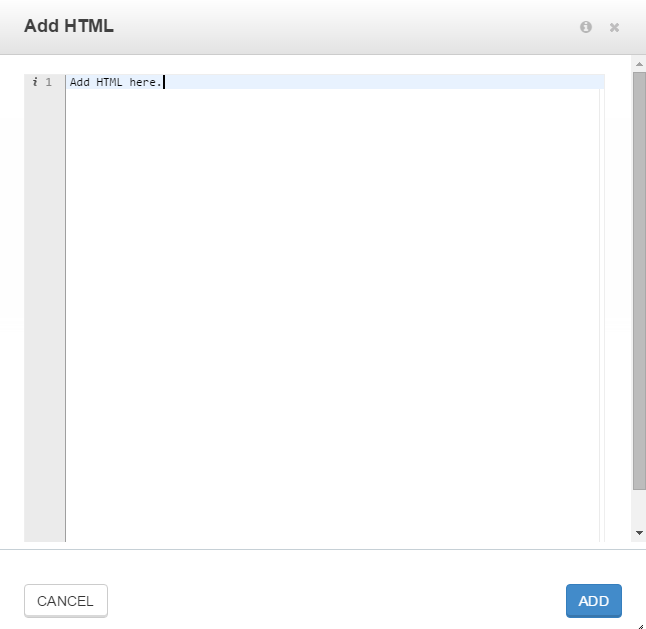
- HTML: This block allows you to paste the code directly into your page. If you have embedded code or javascript, you have to just paste on the page. If you have a complicated HTML made in another program (like a big table layout), this is probably a better block to use than the content block. This block will never try to clean up your code or format it

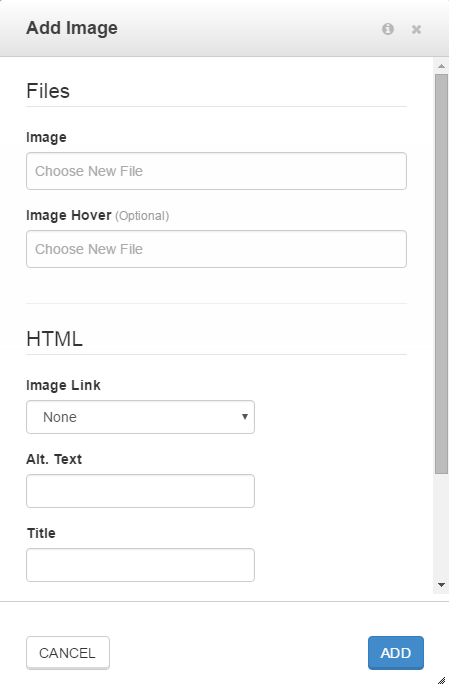
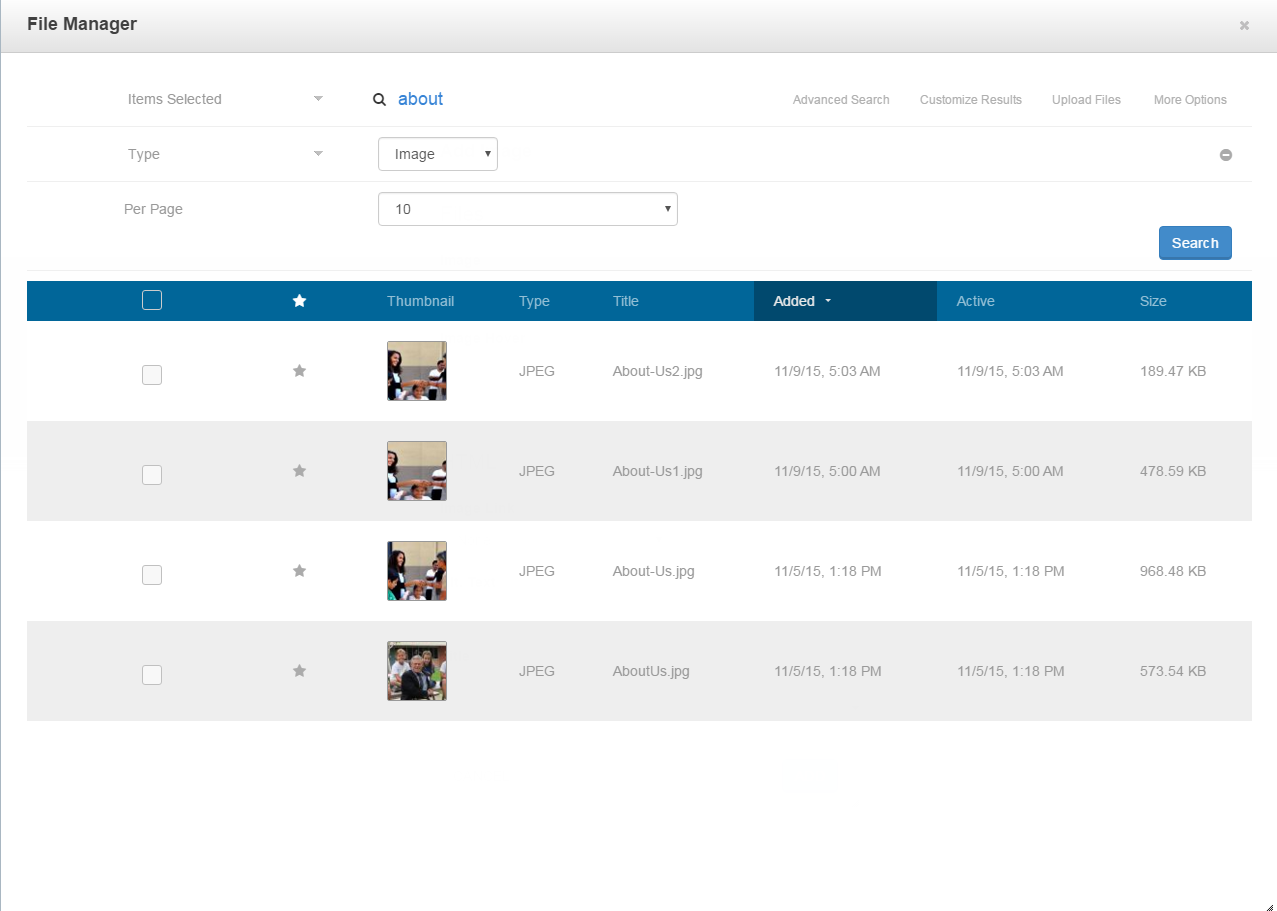
- Image: This block allows you to lock down a block area for a more controlled image placement (like a header area). Though you can add images to your page using the content block, this block is powerful for controlled placements. You can do the following for an image:
- You can add a JPG, GIF or PNG image type.
- The On-State field is optional but will show on roll over of the image in the page.
- Provide a Link URL such that a visitor can view when they click on it.
- Provide ‘Alt Text/Caption’ which is a short description that is useful for SEO.
- Provide a ‘Maximum Dimensions’ to control the size of the image. CMS will fit the image inside this space while maintaining the aspect ratio of the original image.
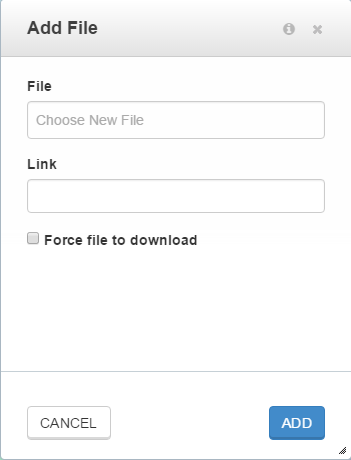
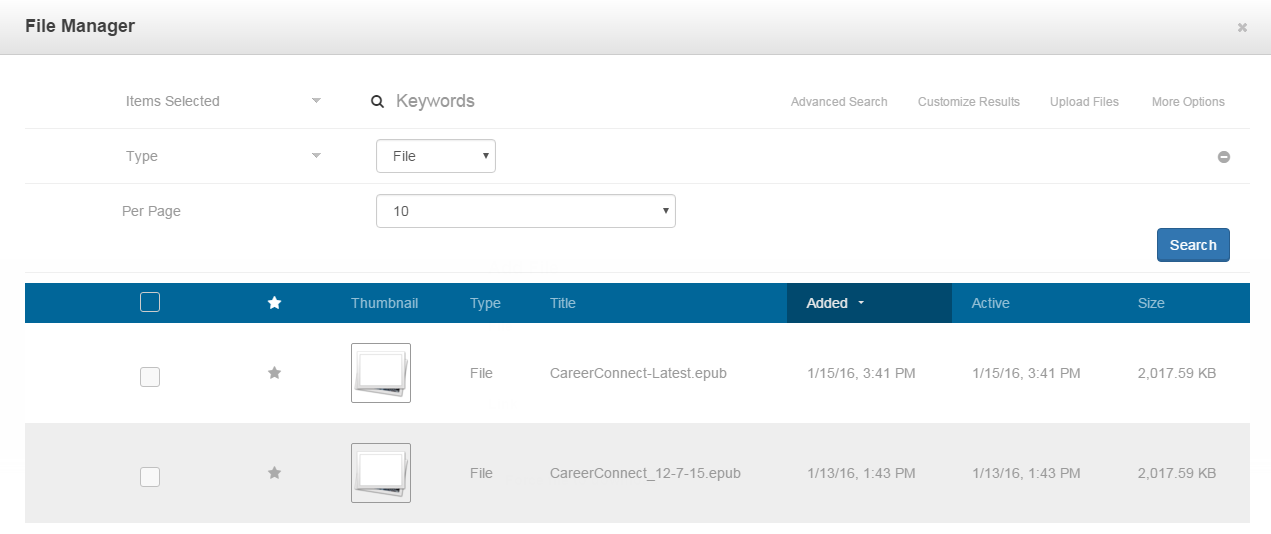
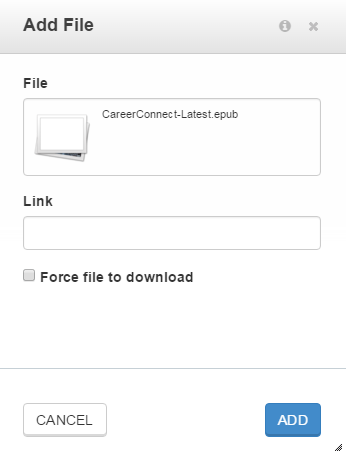
- File: This block allows you to link users to a down loadable file using the following:
- File: You can pick a file from the file manager. You can also upload a file as well.
- Link Text: A link text is displayed instead of the file name. Whatever copy is here will be hyper linked with the download.

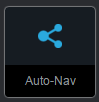
- Auto-Nav:This block will return an unordered list of pages in tree form matching the settings you use. You can then use a custom template at the block level to control formatting of the menu.
- Page List:This allows you to create a navigable list of all your sitemap pages in the location or the sitemap level you specify.

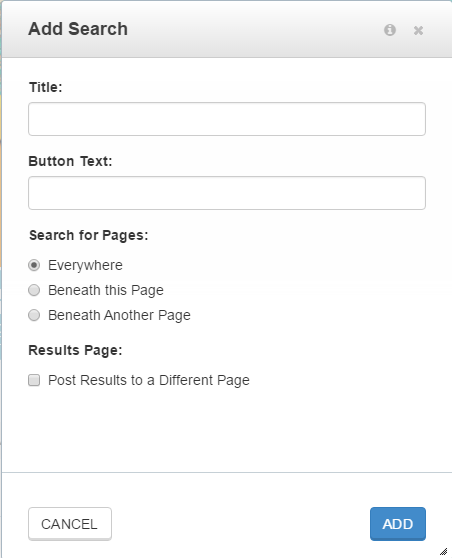
- File:This is a very basic site search that you can configure to match your content. You can view the search using:
- Search Title: This is displayed above each of the site form.
- Search Button Text: This is the copy displayed in the form of a button next to the search field.
- Search Within Path:This lets you limit your search results. It will search pages across your whole site. Beneath this page limits the results to only this part of the site tree. Below this, another page lets you pick which area of the site to search, by hand.
- Results page: The search block displays results in the same areawhere it displays the form. If you are adding search to sidebar or header navigation, this is a problem. You can create a blank page somewhere else with a search block on it, and use it as a search results page. You have to pick that page you have setup as the target for Post to Another Page Elsewhere. The results will display on that new page wherever you put the empty search block.

- Horizontal Rule:This allows you to add a horizontal rule to the current page.

- Image Slider :This allows to create a slideshow. You have to drop the Image Slider block in place, choose a few images or an image set, and your slideshow is complete.
- You can add slides, an optional URL, and a title and a description if you would like that to appear over the image.
- The only universal decision to make is whether you would like your slider navigation to consist of little bullets along the bottom, or if you'd like to have arrows appear on the sides of the slideshow for navigation. Once you have added a slide, you can click the little picture icon at the top of the slide to select an image to use.
- Once you have done that, it's up to you if you would like to add a heading and / or body text to the slide in the ‘Title’ and ‘Description’ fields. You can use the editor to style your description content as well.
- Once you have added slides, or if you are editing an existing slideshow block, you can rearrange the slide order as you please. Just click on the up and down arrows located in the upper right of each slide.

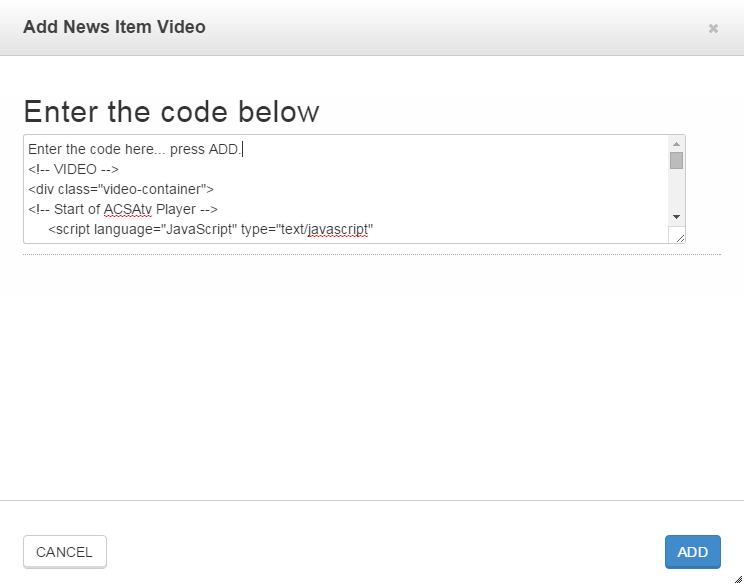
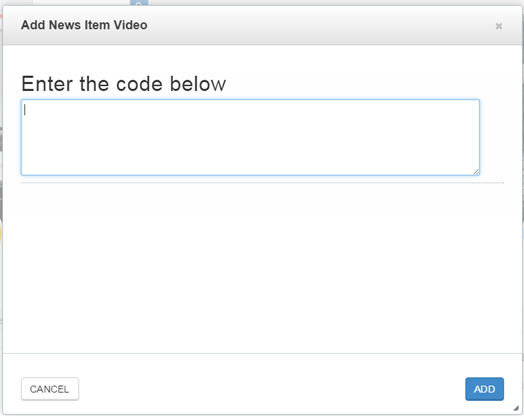
- News Item Video : This allows to add a video player in news item page. You have to drag and drop the block, enter the code and save.


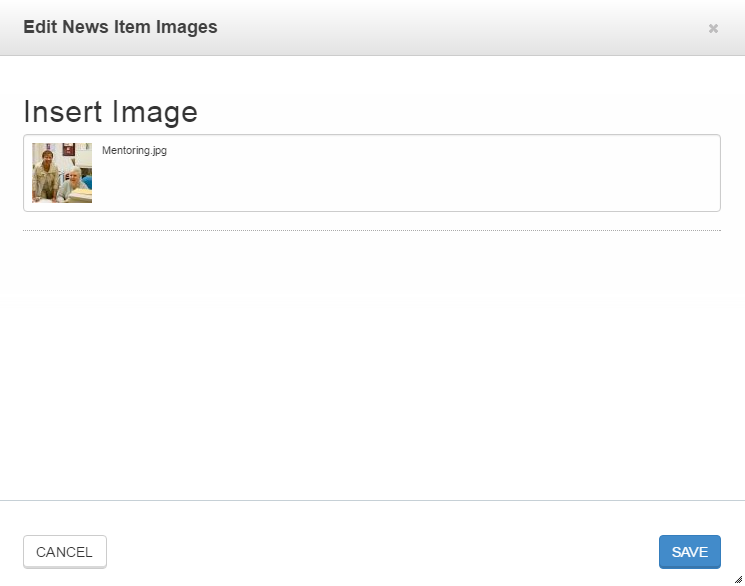
- News Item Images : You can add news item images to the news page. You have to first choose an image from the file manager or upload one and select the image and save.


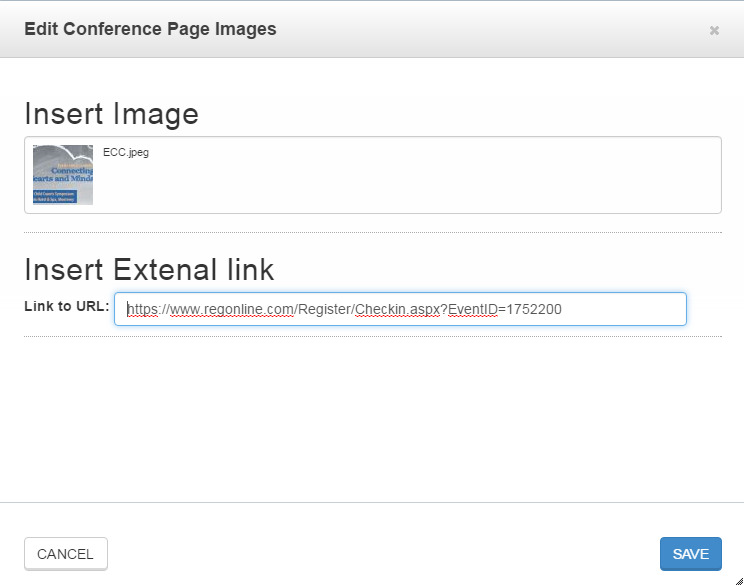
- Conference page Images : You can add images to ‘Conference’ page under “Educational Services” and link the image to an URL.


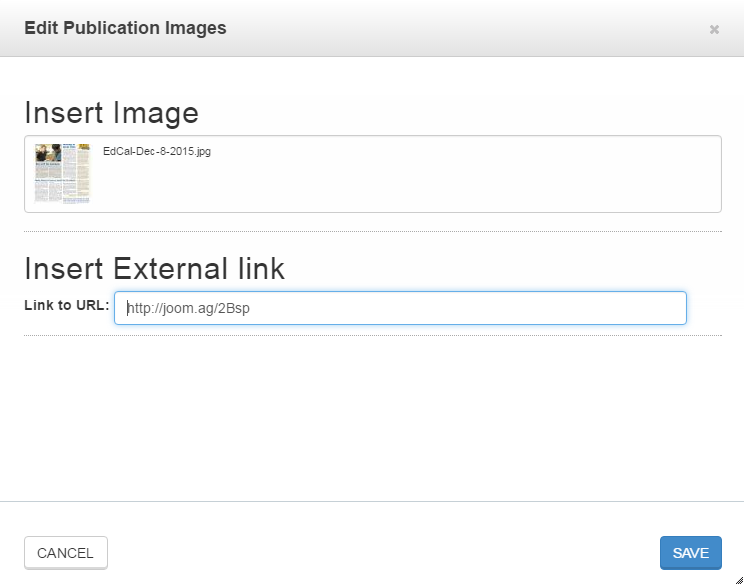
- Publications Images: You can add images to the ‘Publications’ page. You have to first choose an image from the file manager or upload one and select the image, link the image to an URL and save.

- LCAP Logo: You can add the block to upload the LCAP Logo from the file manager.

- Advocacy Images: You can add images to the ‘Advocacy’ page. You have to first choose an image from the file manager or upload one and select the image insert the link and save.

- Logo : You can add the block to add as ‘CareerConnect’ logo from the file manager.

 icon and in the list that opens, click ‘Sitemap’. icon to open the dashboard pane which you can then use to navigate to a subsection of the dashboard quickly.
 Sitemap
You can manage all the pages in the site with the Sitemap tools.
- Full Sitemap is a powerful interface that lets you look at the entire tree at once; opening and closing sections of your site as needed.
- Flat View is very helpful on huge sites. If there are thousands of pages at a single level in your site, the flat view might be much faster and more helpful.
- Page Search lets you find a specific set of pages.
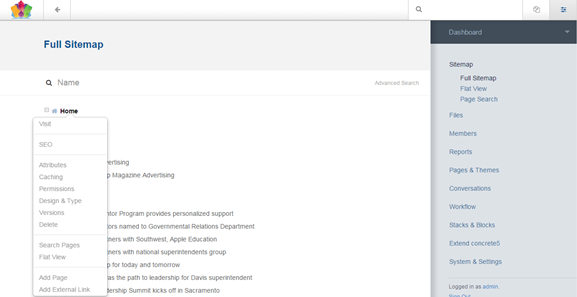
Clicking a page name brings up a menu which maps very closely with the various options for modifying the page.
Clicking any page name on the ‘Sitemap’ brings up a popover menu. If you delete a page, it can be found in the Trash and dragged back into the ‘Sitemap’ if you want to restore it. Otherwise you can empty the trash to get rid of the deleted page forever in much the same way you would on a standard desktop operating systems.
Full Sitemap: You can change a LOT of pages very quickly using the Full Sitemap.
- Navigation Order and Move/Copy: You can re-order navigations in your website by dragging and dropping the pages at any level.
- Click and drag the page icon. A small line appears between two page names as you move your mouse around. As long as you're not moving the page to a new parent you will simply be changing the ‘Sitemap order’. Please note that navigations like the ‘Auto-Nav’ and ‘Page List’ block will default to follow this order.
- If you drop the page on a different part of your site, you can actually move the page, make a new copy, or create an alias. Aliases are just pointers to the original location of the page.
Page Specific Commands - When you click a page's title, this will show you a popup with the following commands:
- Visit: This takes you away from the Dashboard and over to this page on your website.
- SEO: This allows you edit things like meta title, meta description, etc.
- Location: This allows you to edit the page path / slug, or add additional paths.
- Attributes: This shows the page properties window without you having to navigate to that page.
- Caching: You can define caching for the page.
- Permissions: You can define ‘Page Permissions’ for the users.
- Design: You can change the ‘Page Template’ and apply a desired ‘Theme’.
- Version: You can view a list of versions for the current page. Additionally you can either approve or duplicate the version. You can also add a new version or delete the version.
- Delete: You can delete the current page.
- Add Page: This allows you to add a page to the tree from right here. This is a great way to build your basic site tree. You can go back later into each page to add content.
- Add External Link: This allows you to include a link to a 3rd party site within your navigation.
- Restoring Deleted Pages: You can restore a delete page. A Trash page is displayed in the System Pages area. If you have accidentally deleted a page you can restore it from here. You can move it back to your main site tree where you want it.
Flat View: The options here are almost the same as ‘Full Sitemap’. The big difference is the ‘Send to Top’ and ‘Send to Bottom’ commands that allows you to reorganize the tree without having to suffer through dragging and dropping. Move/Copy works in a similar way.
Page Search: This allows you to quickly locate a page in your sitemap. You can also find a group of pages and perform bulk updates.
Members
It is very likely that you will have people other than yourself contributing to your website. You may also want to control access to certain parts of your website, save information about visitors, or simply categorize them all. This allows you to do all this and more.
- Search Users: This allows you to search all the users on your site either by Keywords or Groups. Default columns include User name, Email, Last Modified date and number of logins. If you want to view the detail of any user, click the desired user name.
- Add User: This allows you to create a new user. This is an easy process. Click the ‘Add User’ button and fill in the user information as prompted.
- User Groups: This lists all groups present in your site, and allows searching by keyword. Grouping users allows you to efficiently manage your site's users. Groups can be used for permissions, organization, filtering, and additional programmatic functionality.
- Add Group: You can add a new user group to your site. The group's name and description can be used to help organize users into easily-manageable roles and responsibilities.
- Attributes: This offers a flexible and powerful means of saving information and details about the site's users. Each attribute is a certain attribute type like: a date, a piece of text, a select dropdown, etc.
Several options are available when you are creating a user. The admin can not only set a user's username, password and email address, but can also select which groups to place the user into. An administrator may instead choose to leave these attributes blank and let users themselves fill them in later upon login (for required attributes) or via the ‘Users Profile’ page.
This page provides a list of all the attributes currently in use on the site. You can click an existing attribute to edit its properties, or use the ‘Add Attribute’ dropdown to create a new attribute of a certain type.
Pages and Themes
You can change how your site looks and the types of pages available for your site to use using the below:
Themes: The ‘Themes’ sets the overall look and feel of your site. Themes are presentation focused, and control how your content is presented. Themes can be applied to an entire site through this page.
Page Templates: These are included in the ‘Themes’ page. This can be thought of as a re-usable visual format for the various kinds of pages on your site. For instance, you might have a ‘Left Sidebar’ page on your site that features a left-aligned sidebar design. You might also have a Page Template called ‘Right Sidebar’, ‘Homepage’, or ‘Full Width’. Each of these takes the same blocks you have placed on your page and displays them differently. Like themes, these can be swapped out on-the-fly to change how your page looks with just a few clicks.
Page Types: This represents the data object of each page. These often contain special backend functionality that makes them unique beyond standard pages. Page Types can have different page templates assigned to them for output. This helps to decouple custom page functionality from page design. You can edit these using the following:
- Basic Details - This allows you to specify the following about your page type:
- Page Type Name: The readable name of the page type.
- Page Type Handle: The system handle. It uses only lowercase letters, numbers, and underscores.
- Default Page Template: The page template that will be used by default when a page of this page type is created.
- Launch in Composer: This determines whether or not the composer overlay launches automatically when a page of this page type is created. It is useful if you have lots of attributes or options that need to be set right.
- Is This Page Type Used Frequently?: You can check this box to make sure that the page type always appear in the ‘Pages’ panel. If this checkbox is not selected, this will be tucked away under the "more" section.
- Allowed Page Templates: This allows you to choose which ‘Page Templates’ can be used in conjunction with this ‘Page Type’.
- Publish Method: This allows you to control the publishing flow, e.g. whether users can publish it under any page, below a certain page only, or below pages of a certain page type.
- Edit Form: This allows you to control what attributes are available to edit a page in the ‘Composer’.
- Output: This allows you to see which Page Templates are associated with the Page Type and edit their default content.
- Permissions: This allows you to edit permissions pertaining to this page type: Edit Page Type, Edit Page Type Permissions, and Edit Page Type Drafts.
- Delete: This allows you to delete the page type.
Attributes: This allows you to edit and create the default attributes included in your pages. These control behind-the-scenes page elements like meta tags.
Single Pages: These are special pages that do not use one of the typical ‘Page Types’. They can be used for running custom code and other situations that only need to exist in one particular place on your sitemap.
System & Settings
This consists of basic system settings of your CMS.
1. Click the ![]() icon and choose ‘News Item’.
icon and choose ‘News Item’.
2. The ‘Composer’ appears as shown
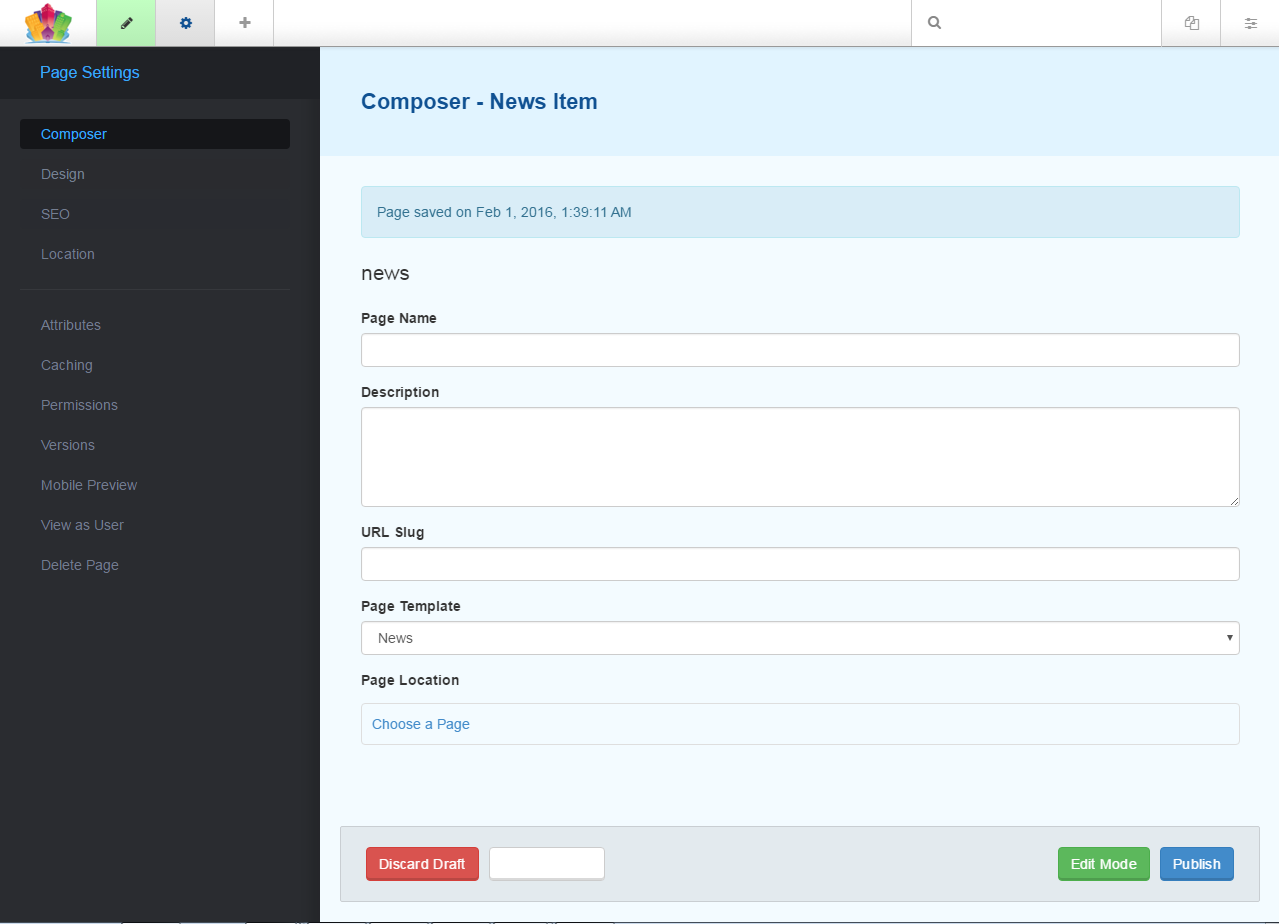
3. You can enter the following information:
- Enter the ‘Page Name’ or title
- Enter the ‘Description’ of the news item
- Enter a ‘URL Slug’
- Select a ‘Page Location’. Choose ‘Newsroom’ as the location
- Click the ‘Edit Mode’ button
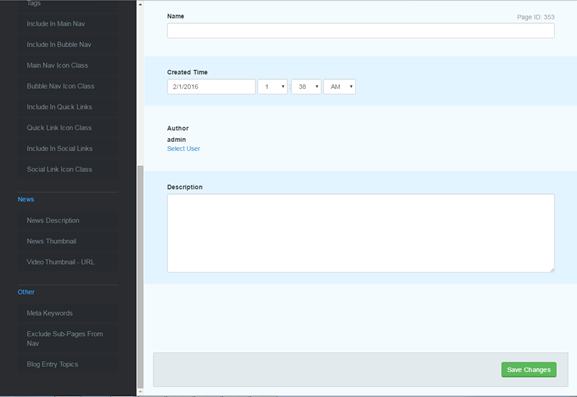
You can add attributes for the ‘News Item’.
1. Click ‘Attributes’ and choose ‘News Thumbnail’ to select an existing image or upload an image. If you want a video, select ‘Video Thumbnail- URL’ and paste the code and save.
- Description: Enter a brief description about the news to be displayed on ‘Home’ page and ‘Newsroom’ page
- News Thumbnail: Choose an image or upload one to select to display as the news thumbnail
- Video Thumbnail - URL: Add a video code to display as video thumbnail
2. Click ‘Save Changes’.
The ‘News Item’ now displays on the ‘Home’ page. You can edit the news area clicking the icon. You can ‘Add Sub Heading’ block and add the news title.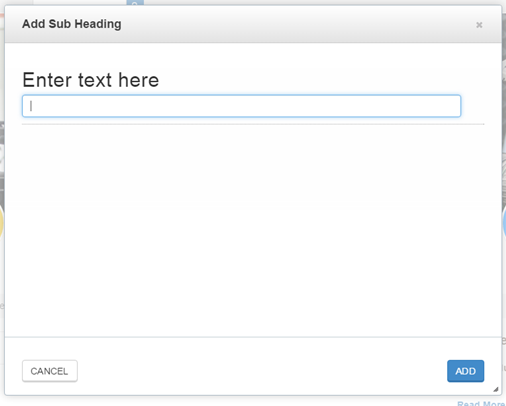
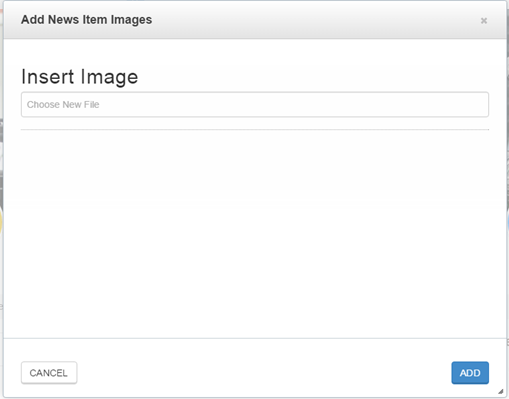
You can ‘Add News Item Image’ block for image. Choose an image for display from the file manager or upload an image. You can ‘Add News Item Video’. To add a video, enter the code and save.
After the ‘Sub Heading’ and ‘Images’, you can add content. Select the ‘Text’ content block, add the contents and save.
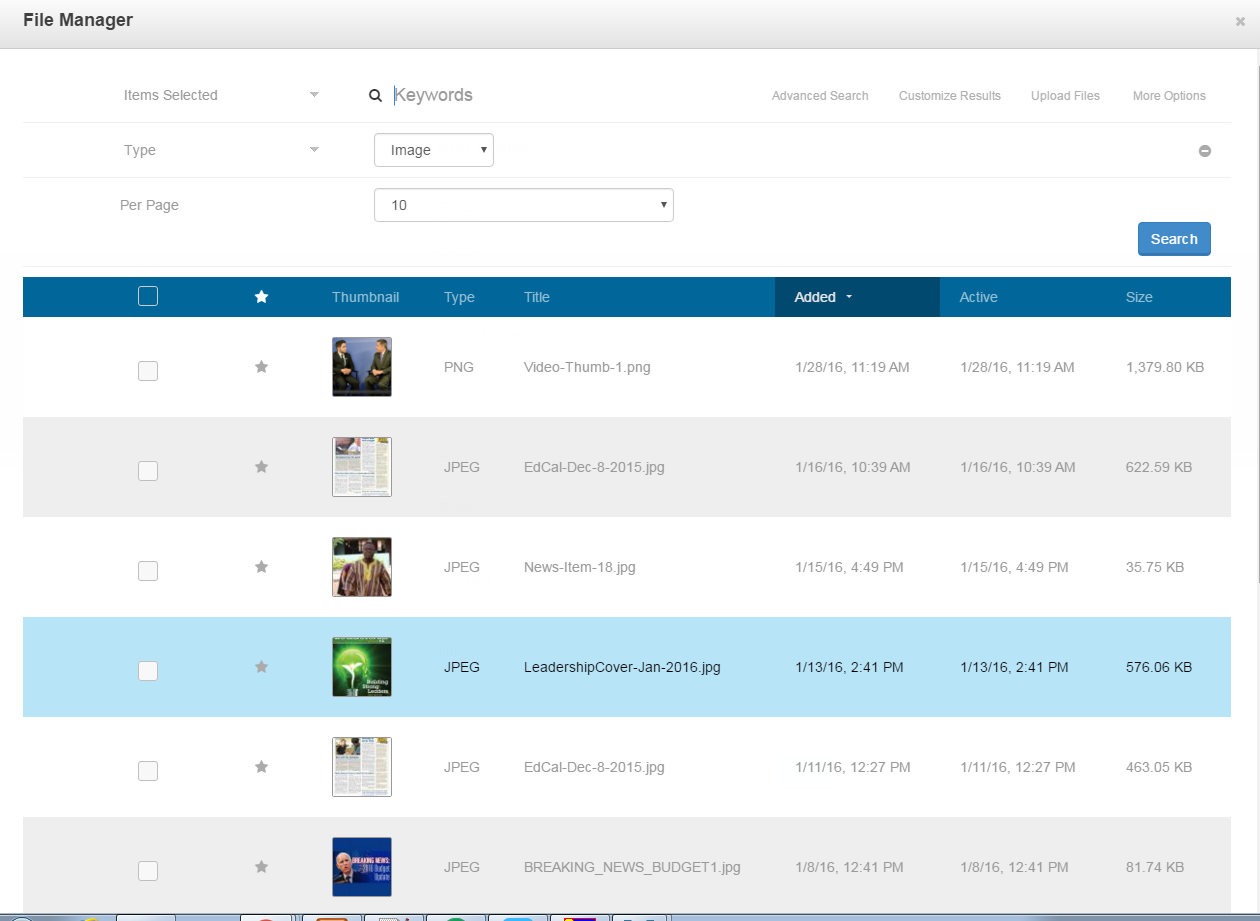
- Keywords: This searches the file name and meta data available for a match.
- Sets: The files can be organized into Sets. Sets are NOT hierarchy like folders, but rather behave more like Labels where a file can be in more than one ‘Set’ easily. You do NOT have to manage a folder structure for your files.
- With Selected: When you click a few of the check boxes next to the files, or the check box in the header to select all of them, the ‘With Selected’ menu will let you perform bulk actions to all of those files.
- Add File(s): You can upload a file or files by dragging and dropping them onto the page or clicking ‘Upload Files’ and choosing the files you would like to upload.
- Upload Options: This allows you to FTP files into an Incoming directory on the server to import, or you can point to remote URLs to pull a copy of the file into the File manager for you.
File Sets
Finding the assets you need on your website can be a real challenge. If you've ever tried to organize a lot of files on your computer you've likely run into the limits of using a single hierarchy. More often than not a single file might belong in more than one place. A single image might belong in /client_assests, /headshots, and /lifestyle. You either end up with three copies, a lot of aliases/symlinks, or just make a choice and live with a less than accurate model of your data. In reality, most assets belong in many different categories, not only one.
File sets let you easily organize files in this new organic fashion. You can add a single file to as many sets as you like. Sets can have an order, but that order is tied to the set, not the file. So that image that fell into many folders above could easily be in a set for each, and might be first in line for one set and burried deep within another.
Sets can not contain other sets.
Creating Sets and Adding Files
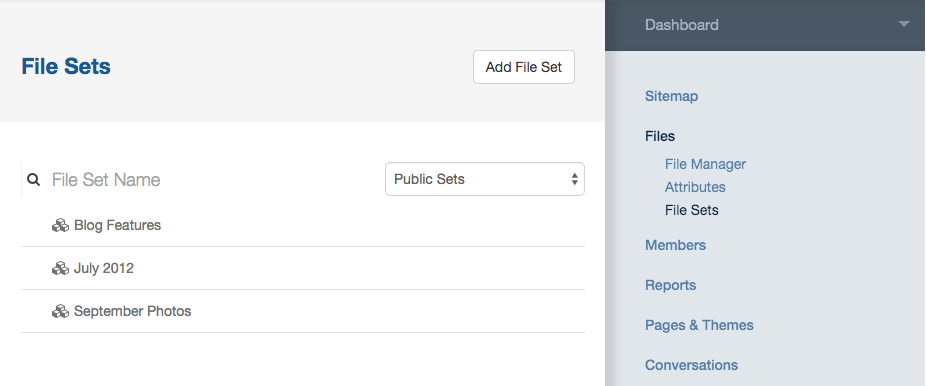
Pick "Sets" from the menu you get when clicking on any existing file.
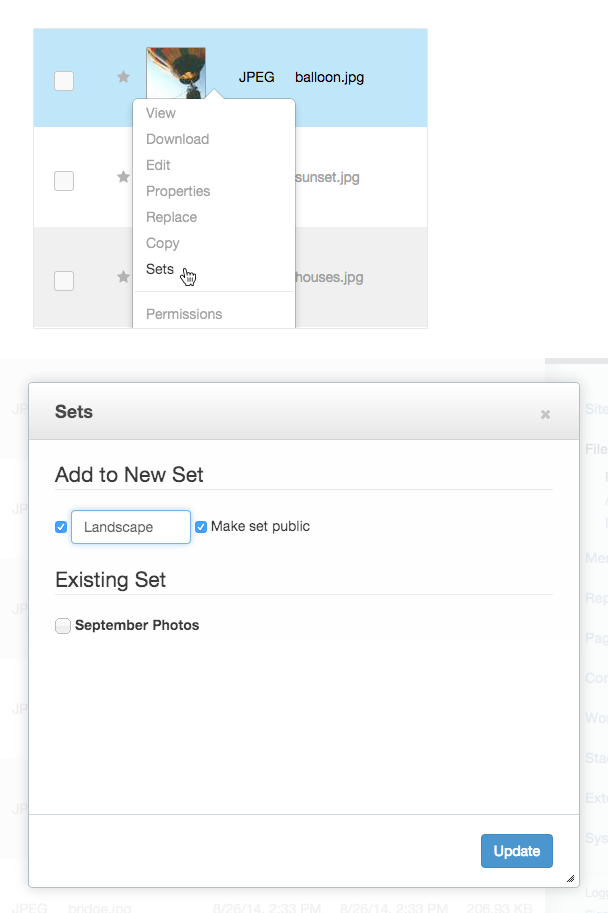
Once you get to the Set detail dialogue, you can add the file to existing sets, or create a new one.
The field at the top limits the sets shown. If you've got lots and lots of sets this is very handy.
Checking the check boxes next to existing sets lets you add the file to multiple existing sets.
You can add a new set by just typing a name for it. Sets can be shared with anyone or tied to permissions (Hence the "make set public" check box).
Once you have some sets made, you will see a "In Set(s)" option in your file manager.
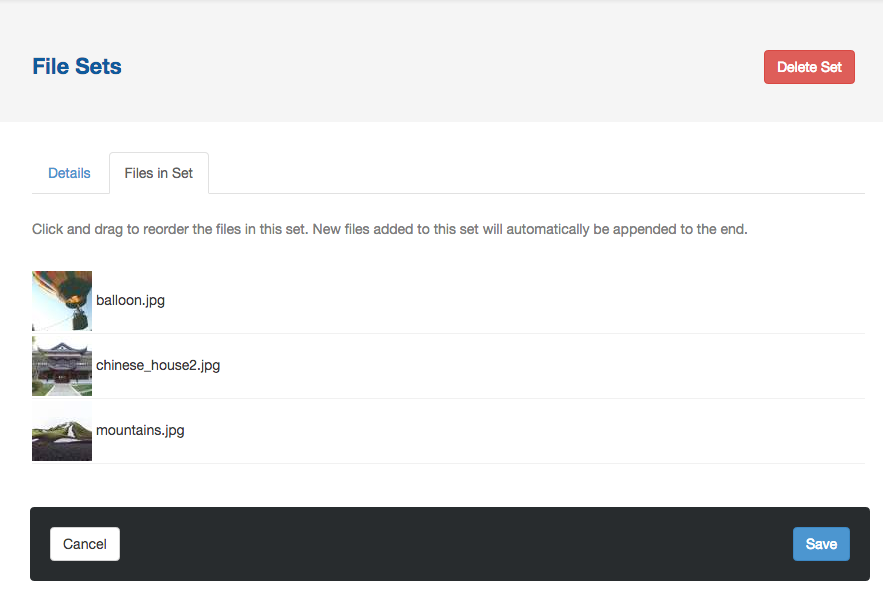
You can change the name of a file set, and change the order of the files within that set.
On the file sets page, you are presented with a list of all of the sets on your site. You can also create a new set from here.
Clicking on any of these sets will get you to a detail page.
The Details tab lets you change the set name.
The Files In Set tab shows you all the files contained in the set, and lets you drag and drop the order of those files for the set.
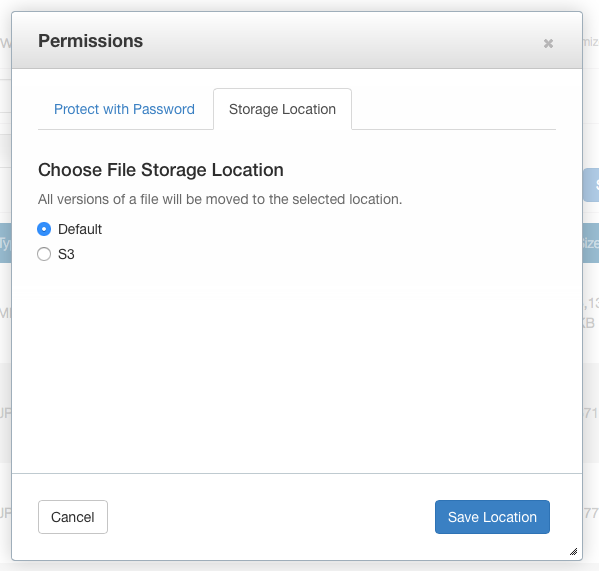
File Storage Locations
You can define multiple file storage locations in the Dashboard, and their type determines options about them.
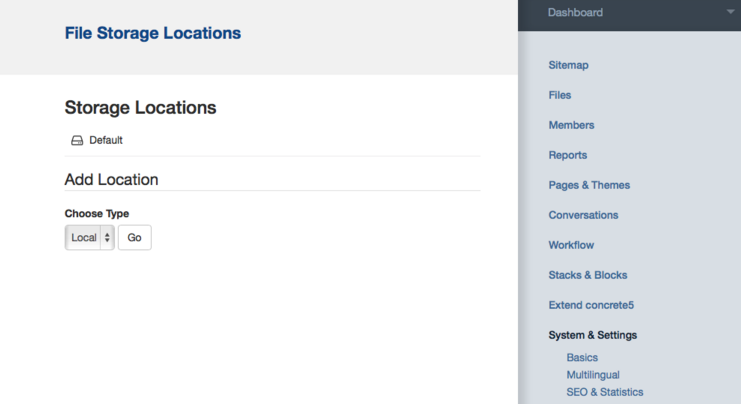

In these two screenshots, we're showing the list of file storage locations, and adding a new one. The only type of file storage location installed by default is the "Local" file storage location, which is simply a directory on the same server. (Note: this directory can be within the web root, but doesn't have to be.) You add new file storage location functionality to your site by installing new file storage location types, which come bundled in packages. For example, here's what the Amazon S3 File Storage Location type looks like when you add a new location of that type. You choose the type, and then set the relevant options for it.
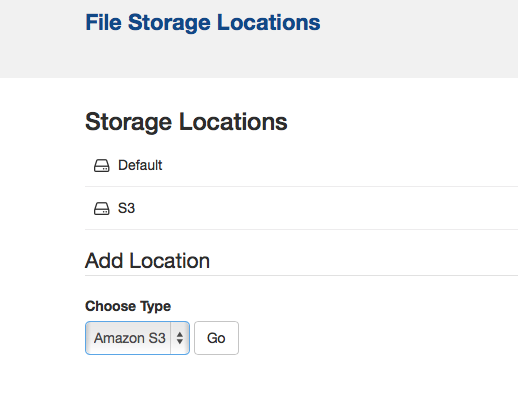
Any file storage location that's registered in the system can be the default storage location. Any file added to the file manager goes into this storage location by default. You can also choose which storage location a file uses on a file-by-file basis, using the Permissions dialog in the File Manager.
User Groups
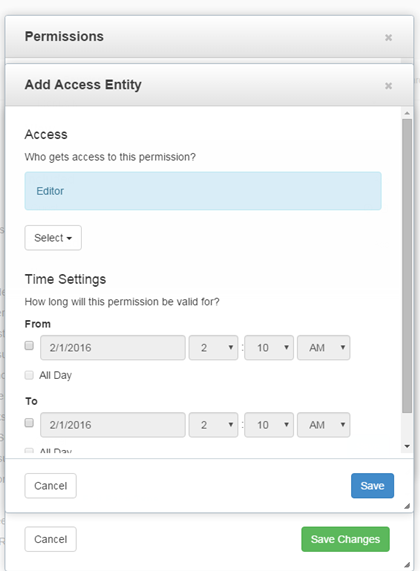
- Access Sitemap: This allows selected users & groups use the ‘Sitemap’ when picking page links.
- Change Task Permissions: This allows users or groups to alter task permissions (whatever they are working with right now) for themselves and others. This option is typically enabled for site administrators.
- Uninstall Packages: This allows you to remove packaged add-ons and themes from the site.
- View Newsflow: This allows you to access the Dashboard to view daily "Newsflow", community content when first logging into a site.
- Perform Backups: This setting includes or excludes the users and groups you have selected from using the database backup tool.
- Access Task Permissions: This helps you to allow other users to change ‘Task Permissions’, or exclude specific administrative users from doing so.
- Access Page Type Defaults: This controls who can view and edit the default blocks on your site's ‘Page Types’.
- Empty Trash: This determines who can permanently delete pages from your sitemap's trash can.
- Administrator: The Administrator has all the task permissions.
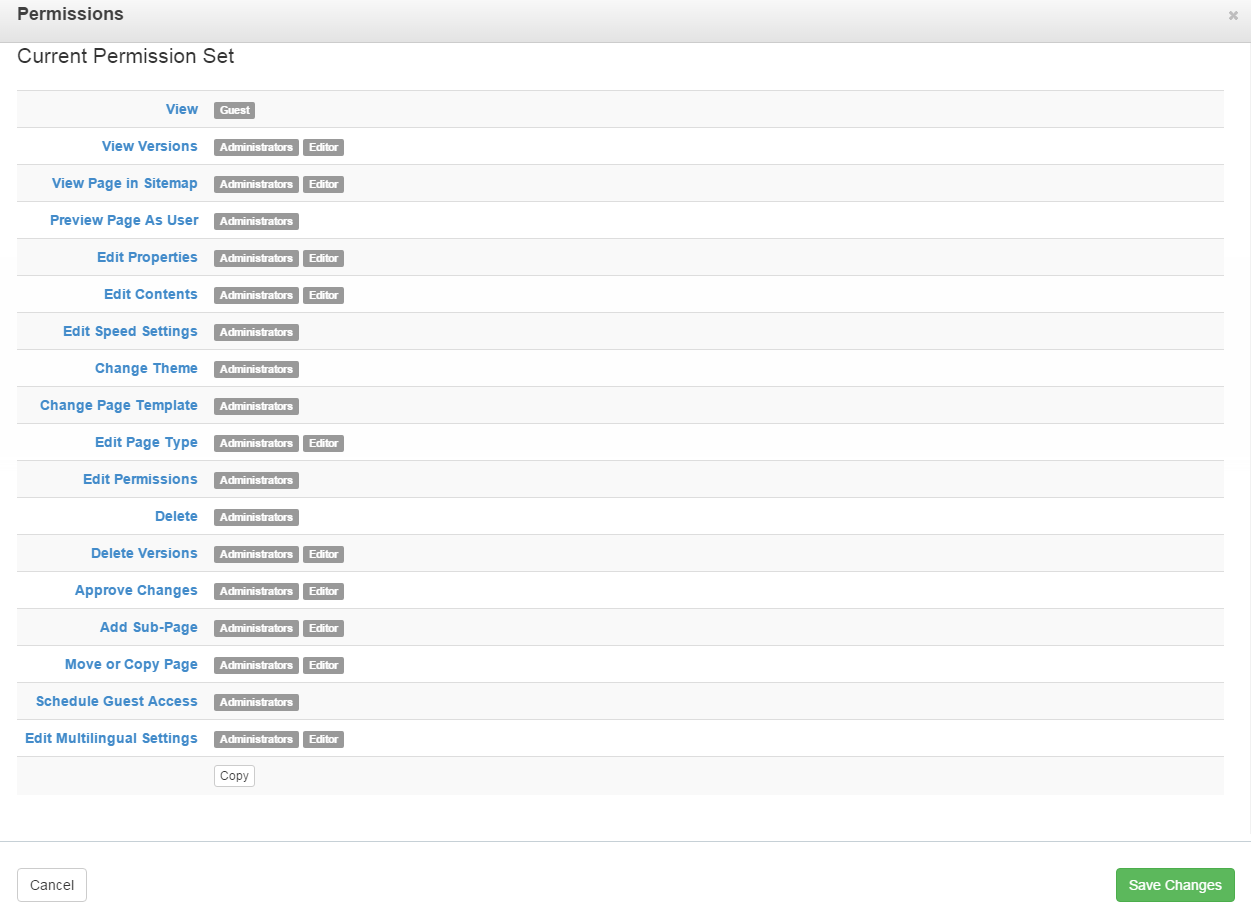
Editor: The administrator sets up the permissions for an ‘Editor’.
You can change the permissions.
- On the Dashboard, click ‘Sitemap’
- Right click ‘Home’ and from the drop down menu, choose ‘Permissions
You can make changes to the permission here. Click ‘Save Changes’ after making the changes.
icon to pop out the dashboard pane. Click ‘Sign Out’ link at the bottom of the pane.